Traditional machine control panels are large sheets of steel with
pushbuttons, knobs, lights and sometimes meters mounted on them. They
have many advantages - the buttons are far more rugged than a computer
keyboard, and large enough that you can usually operate the correct
one by feel while looking elsewhere, for example at the tool. However,
they also have disadvantages. The occupy a lot of panel space, they
are expensive, and wiring them into the PC can use up a lot of I/O
pins. That is where Virtual Control Panels come in.
A Virtual Control Panel (VCP) is a window on the computer screen with
buttons, meters, switches, etc. When you click on a VCP button, it
changes the state of a HAL pin, exactly as if you had pressed a physical
button wired to an input pin on an I/O card. Likewise, a VCP LED lights
up when a HAL pin goes true, just like a physical indicator lamp wired
to an output pin on an I/O card. Virtual control panels are not intended
to replace physical panels - sometimes there is just no substiture
for a big rugged oil-tight pushbutton. But virtual panels can be used
for testing or monitoring things that don't require physical buttons
and lights, to temporarily replace real I/O devices while debugging
ladder logic, or perhaps to simulate a physical panel before you build
it and wire it to an I/O board.
Currently there are two VCP implementations included with EMC2: The
older, simply named VCP, which used GTK widgets, and the newer, called
pyVCP, which uses Tkinter widgets. VCP is deprecated and should not
be used - it may be removed in the future.
The layout of a pyVCP panel is specified with an XML file that contains
widget tags between <pyvcp> and </pyvcp>. For example:
-
- <pyvcp>
<label>
<text>"This is a LED indicator"</text>
</label>
<led>
</led>
</pyvcp>

If you place this text in a file called tiny.xml, and run
-
- pyvcp -c mypanel tiny.xml
pyVCP will create the panel for you, which includes two widgets, a
Label with the text ``This is a LED indicator'', and a LED, used
for displaying the state of a HAL BIT signal. It will also create
a HAL component named ``mypanel'' (all widgets in this panel are
connected to pins that start with ``mypanel.''). Since no <halpin>
tag was present inside the <led> tag, pyVCP will automatically name
the HAL pin for the LED widget mypanel.led.0
For a list of widgets and their tags and options, see the widget reference
below.
Once you have created your panel, connecting HAL signals to and form
the pyVCP pins is done with 'halcmd linksp' as usual. If you are new
to HAL, the HAL Tutorial![[*]](crossref.png) is recommended.
is recommended.
Since AXIS uses the same GUI toolkit (Tkinter) as pyVCP, it is possible
to include a pyVCP panel on the right side of the normal AXIS user
interface. A typical example is explained below.
Place your pyVCP XML file describing the panel in the same directory
where your .ini file is. Say we we want to display the current spindle
speed using a Bar widget. Place the following in a file called spindle.xml:
-
- <pyvcp>
<label>
<text>"Spindle speed:"</text>
</label>
<bar>
<halpin>"spindle-speed"</halpin>
<max_>5000</max_>
</bar>
</pyvcp>
Here we've made a panel with a Label and a Bar widget, specified that
the HAL pin connected to the Bar should be named ``spindle-speed'',
and set the maximum value of the bar to 5000 (see widget reference
below for all options). To make AXIS aware of this file, and call
it at startup, we need to specify the following in the [DISPLAY]
section of the .ini file:
-
- PYVCP = spindle.xml
To make our widget actually display the spindle-speed it needs to
be hooked up to the appropriate HAL signal. A .hal file that will
be run once AXIS and pyVCP have started can be specified in the [HAL]
section of the .ini file:
-
- POSTGUI_HALFILE = spindle_to_pyvcp.hal
This change will run the HAL commands specified in ``spindle_to_pyvcp.hal''.
In our example the contents could look like this:
-
- linksp spindle-rpm-filtered pyvcp.spindle-speed
assuming that a singlal called ``spindle-rpm-filtered'' already
exists. Note that when running together with AXIS, all pyVCP widget
HAL pins have names that start with ``pyvcp.''.
This is what the newly created pyVCP panel should look like in AXIS.
HAL signals come in two variants, BIT and FLOAT. pyVCP can either
display the value of the signal with an indicator widget, or modify
the signal value with a control widget. Thus there are four classes
of pyVCP widgets that you can connect to a HAL signal. A fifth class
of helper widgets allow you to organize and label your panel.
- [1.] Widgets for indicating BIT signals: LED
- [2.] Widgets for controlling BIT signals: Button, Checkbutton,
Radiobutton
- [3.] Widgets for indicating FLOAT signals: Number, Bar, Meter
- [4.] Widgets for controlling FLOAT signals: Spinbox, Scale, Jogwheel
- [5.] Helper widgets: Hbox, Vbox, Label
Each widget is described briefly, followed by the markup used, and
a screenshot. All tags inside the main widget tag are optional.
A LED is used to indicate the status of a BIT signal. The LED color
will be on_color when the BIT signal is true, and off_color otherwise.
-
- <led>
<halpin>"my-led"</halpin>
<size>50</size>
<on_color>"blue"</on_color>
<off_color>"black"</off_color>
</led>

<halpin> sets the name of the pin, default is ``led.n'', where
n is an integer
<size> sets the size of the led, default is 20
<on_color> sets the color of the LED when the pin is true. default
is ``green''
<off_color> sets the color of the LED when the pin is false. default
is ``ref''
A button is used to control a BIT pin. The pin will be set True when
the button is pressed and held down, and will be set False when the
button is released.
-
- <button>
<halpin>"my-button"</halpin>
<text>"ON"</text>
</button>

A checkbutton controls a BIT pin. The pin will be set True when the
button is checked, and false when the button is unchecked.
-
- <checkbutton>
<halpin>"my-checkbutton"</halpin>
</checkbutton>
An unchecked checkbutton:  ,
and a checked one:
,
and a checked one: 
A radiobutton will set one of a number of BIT pins true. The other
pins are set false.
-
- <radiobutton>
<choices>["one","two","three"]</choices>
<halpin>"my-radio"</halpin>
</radiobutton>

Note that the HAL pins in the example above will me named my-radio.one,
my-radio.two, and my-radio.three
The number widget displays the value of a FLOAT signal.
-
- <number>
<halpin>"my-number"</halpin>
<font>('Helvetica',50)</font>
<format>"+4.3f"</format>
</number>
<font> is a Tkinter font type and size specification. Note that on
Ubuntu 6.06 'Helvetica' is not available in sizes above ca 40 or 50.
One font that will show up to at least size 200 is 'courier 10 pitch',
so for a really big Number widget you could specify:
-
- <font>('courier 10 pitch',100)</font>
<format> is a 'C-style' format specified that determines how the number
is displayed.
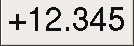
A bar widget displays the value of a FLOAT signal both graphically
using a bar display and numerically.
-
- <bar>
<halpin>"my-bar"</halpin>
<min_>0</min_>
<max_>123</max_>
<bgcolor>"grey"</bgcolor>
<fillcolor>"red"</fillcolor>
</bar>
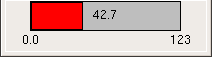
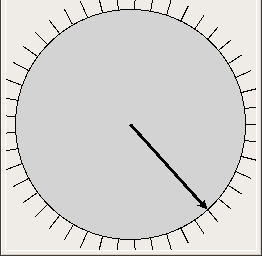
Meter displays the value of a FLOAT signal using a traditional dial
indicator.
-
- <meter>
<halpin>"my-meter"</halpin>
<text>"Voltage"</text>
<size>300</size>
<min_>-12</min_>
<max_>33</max_>
</meter>
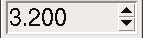
Spinbox controls a FLOAT pin. You increase or decrease the value of
the pin by 'resolution' by either pressing on the arrows, or pointing
at the spinbox and rolling your mouse-wheel.
-
- <spinbox>
<halpin>"my-spibox"</halpin>
<min_>-12</min_>
<max_>33</max_>
<resolution>0.1</resolution>
<format>"2.3f"</format>
<font>('Arial',30)</font>
</spinbox>
Scale controls a FLOAT pin. You increase or decrease the value of
the pin be either dragging the slider, or pointing at the scale and
rolling your mouse-wheel.
-
- <scale>
<halpin>"my-scale"</halpin>
<resolution>0.1</resolution>
<orient>HORIZONTAL</orient>
<min_>-33</min_>
<max_>26</max_>
</scale>

Jogwheel mimics a real jogwheel by outputting a FLOAT pin which counts
up or down as the wheel is turned, either by dragging in a cricular
motion, or by rolling the mouse-wheel.
-
- <jogwheel>
<halpin>"my-wheel"</halpin>
<cpr>45</cpr>
<size>250</size>
</jogwheel>
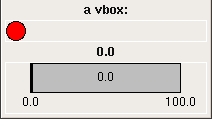
Use a Hbox when you want to stack widgets horizontally next to eachother.
-
- <hbox>
<label><text>"a vbox:"</text></label>
<led></led>
<number></number>
<bar></bar>
</hbox>

Use a Vbox when you want to stack widgets verticallyon top of eachother.
-
- <vbox>
<label><text>"a vbox:"</text></label>
<led></led>
<number></number>
<bar></bar>
</vbox>
A label is a piece of text on your panel.
-
- <label>
<text>"This is a Label:"</text>
<font>('Helvetica',20)</font>
</label>
NOTE: VCP is deprecated, and will most likely not be getting any new
development or additional widgets. We strongly recommend using pyVCP.
Both pyVCP and VCP are included in EMC version 2.1, but it is likely
that only pyVCP will be included in EMC 2.2. 1.1
Place the following in the file tiny.vcp:
-
- vcp {
main-window {
box {
button {
halpin = vcp.pushbutton
label { text = "Push Me" }
}
LED {
halpin = vcp.light
}
}
}
}
The above file describes a tiny Virtual Control Panel, with one push
button, and one light. To see what it looks like, we need to start
HAL:
-
- $halrun
halcmd:
Next we load halvcp, and give it the name of our .vcp file:
-
- halcmd: loadusr halvcp tiny.vcp
halcmd:
There may be some text printed as halvcp parses the tiny.vcp file,
but when it finishes, there should be a small window on your screen,
with a button and an LED. It will look something like figure .
Figure:
tiny.vcp on the screen
|
|
So, we have a button and an LED, but they aren't connected to anything,
so nothing happens when you push the button. However, the LED and
the button both have HAL pins associated with them:
-
- halcmd: show pin
Component Pins:
Owner Type Dir Value Name
03 bit IN FALSE vcp.light
03 bit OUT FALSE vcp.pushbutton
halcmd:
To make something happen, we can connect a HAL signal between the
button and the light:
-
- halcmd: newsig jumper bit
halcmd: linksp jumper vcp.pushbutton
halcmd: linksp jumper vcp.light
halcmd: show sig
Signals:
Type Value Name
bit FALSE jumper
==> vcp.light
<== vcp.pushbutton
halcmd:
Now push the button, and the the LED should light up!
Place the following in the file estop.vcp:
-
- vcp {
main-window {
toggle { halpin = vcp.estop }
}
}
In your .hal file, remove any existing signal linked to iocontrol.0.emc-enable-in
and add the following lines:
-
- loadusr -W halvcp estop.vcp
newsig estop bit
linkps vcp.estop => estop
linkps estop => iocontrol.0.emc-enable-in
Now, when running your machine, the ESTOP button in the GUI is disabled,
and the ESTOP button in the VCP window is used instead.
A block's format is:
-
- tag { contents }
The contents can consist of attributes that describe the block, or
other blocks that nest inside it.
A attribute's format is
-
- name = value
The attribute names that are acceptable for each block depend on the
block tag, and will be listed later.
Footnotes
- ...1.1
- A .vcp to .xml translator that takes a vcp file and turns it into
one that pyVCP can use is on my to-do list. That would enable VCP
users to easily switch over to pyVCP. If such a translator is written,
VCP may be removed from the version 2.2 release.
2007-01-21
